
Introduction
Welcome, nail art enthusiasts, to a journey through the mesmerizing realm of gradient nails. As the world awakens from the slumber of winter and bursts forth in a riot of color, there’s no better time to embrace the beauty of gradient nails—a technique that seamlessly blends hues, creating an ethereal ombre effect that captivates the eye and stirs the soul. Join me as we explore the artistry, techniques, and joy of mastering gradient nails for the vibrant season of spring.

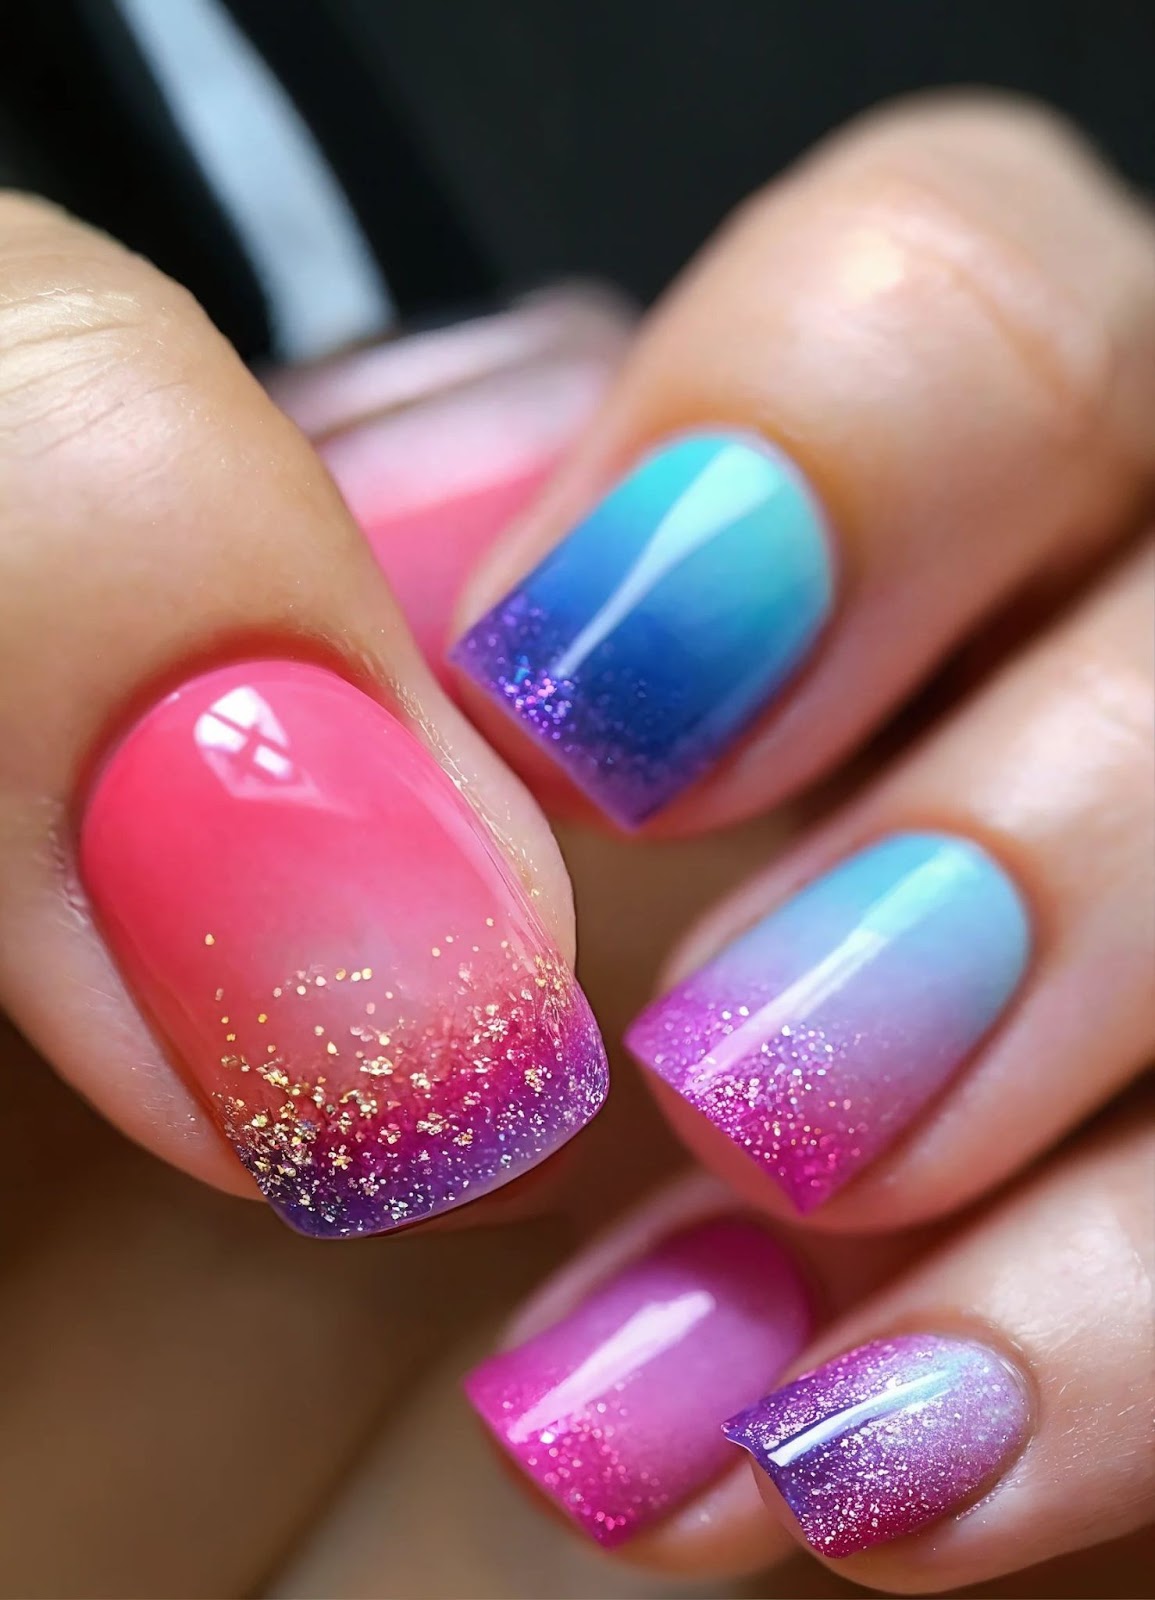
What are Gradient Nails?
Imagine standing at the edge of a serene lake, watching as the colors of the sunset meld together in a breathtaking display of beauty. Gradient nails evoke this same sense of wonder, blending two or more nail polish colors seamlessly to create a transition that is as smooth as silk. With each stroke of polish, your nails become a canvas upon which to express your creativity, adding depth and dimension to your manicure with every layer.
The Importance of Gradient Nails for Your Spring Look
Spring is a time of renewal, a season that invites us to shed our winter layers and embrace the warmth and vibrancy of new beginnings. Gradient nails offer the perfect opportunity to reflect the spirit of the season, with their soft, blended colors mirroring the gentle awakening of nature. Whether you’re attending a garden party, strolling through a blooming meadow, or simply enjoying the sunshine, gradient nails add a touch of elegance and sophistication to any look, making them the perfect accessory for springtime adventures.
Materials Needed for Gradient Nail Art
Before we begin our journey into the world of gradient nails, let’s gather the tools and supplies we’ll need for the adventure ahead. You’ll want to have a variety of nail polish colors in your chosen palette, a soft makeup sponge for blending, a reliable base coat and top coat to ensure longevity, and an assortment of embellishments such as nail stickers, stamps, glitter, or rhinestones to add that extra touch of sparkle and flair to your manicure. With these essentials in hand, you’ll be well-prepared to unleash your creativity and create stunning gradient nail designs.
Preparing Your Nails
Just as a painter prepares their canvas before beginning a masterpiece, so too must you prepare your nails for the artistry to come. Start by shaping and buffing your nails to create a smooth surface, then gently push back your cuticles to create a clean, tidy nail bed. Apply a base coat to protect your nails from staining and to provide a smooth surface for your gradient colors to adhere to. Finally, select your nail polish colors, choosing shades that complement each other and create a cohesive gradient effect.
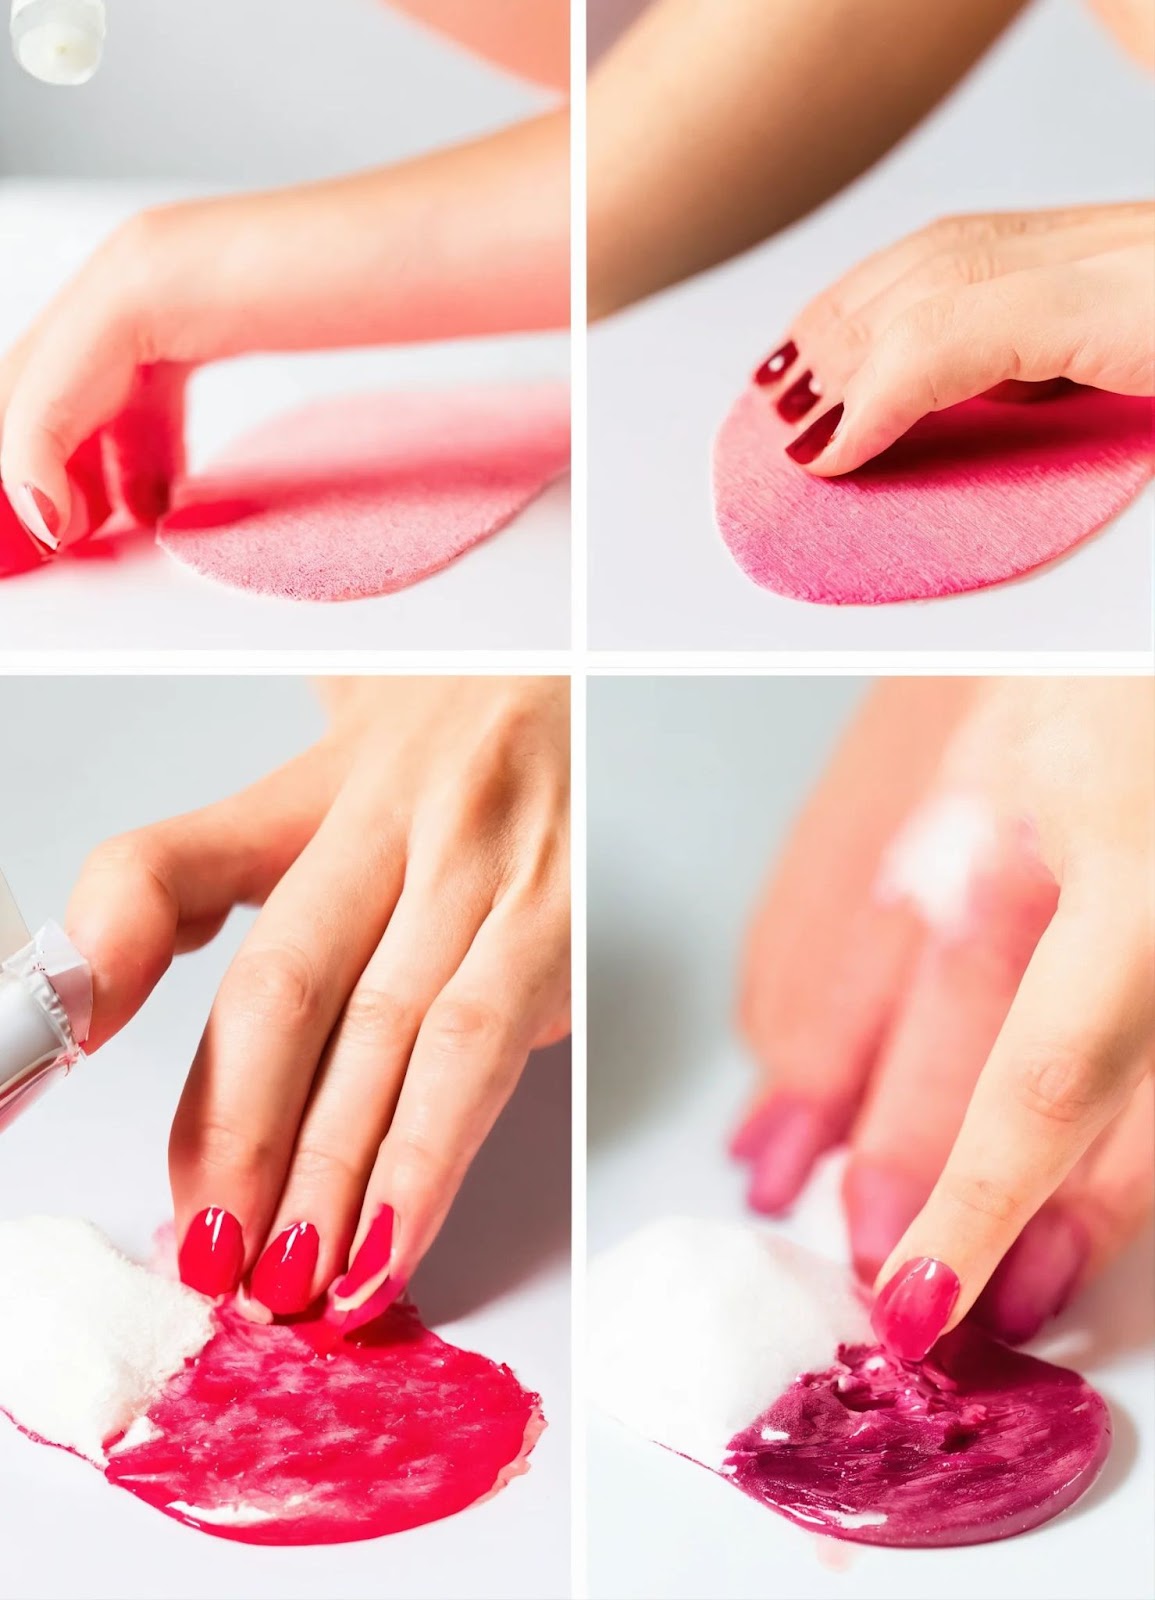
Creating the Gradient Effect
With your nails prepped and your colors selected, it’s time to dive into the creative process of blending your gradient colors. Dip a corner of your makeup sponge into the first nail polish color and dab it onto your nail, starting at the base and working your way toward the tip. Repeat this process with each color, slightly overlapping the edges to create a seamless transition between shades. Use a light hand and build up the color gradually, allowing each layer to dry before applying the next for a smooth and even gradient effect.

Adding Design and Finishing Touches
Once your gradient base is complete, it’s time to add the finishing touches that will elevate your manicure to the next level. Whether you prefer delicate floral patterns, geometric designs, or sparkling accents, the possibilities are endless when it comes to nail art. Let your creativity shine as you adorn your nails with intricate details and personal touches, transforming them into miniature works of art. Finish with a generous layer of top coat to seal in your design and add a glossy finish that will keep your gradient nails looking fresh and vibrant for days to come.
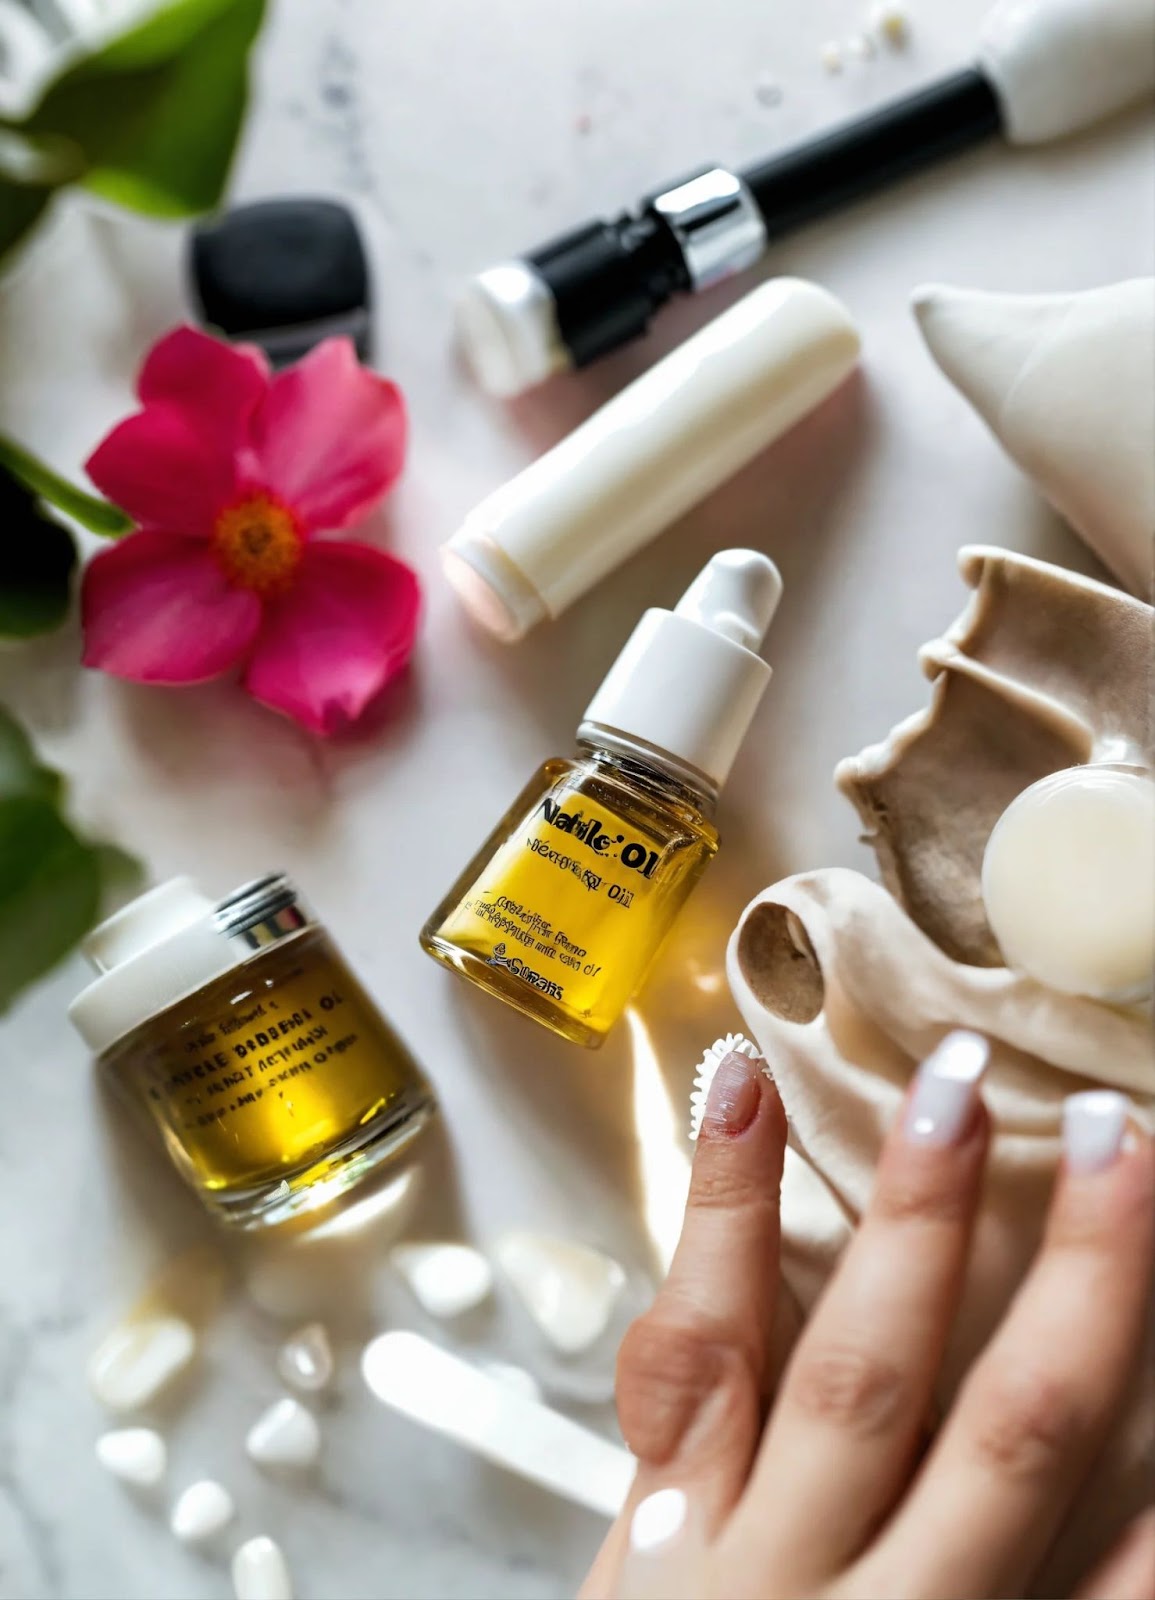
Maintenance and Removal
Just as a garden requires care and attention to flourish, so too do your gradient nails require proper maintenance to preserve their beauty and longevity. Follow these simple steps to keep your manicure looking fresh and vibrant:
- Maintenance
- Moisturize Regularly: Keep your cuticles hydrated by moisturizing them regularly with a nourishing cuticle oil or cream. Healthy cuticles not only promote nail growth but also contribute to the overall appearance of your manicure.
- Apply Top Coat: Extend the lifespan of your gradient nails by applying a fresh top coat every few days. Not only does this add an extra layer of protection, but it also enhances the shine and vibrancy of your manicure, keeping it looking salon-fresh.
- Protect Your Hands: Remember to wear gloves while performing household chores or engaging in activities that may expose your nails to harsh chemicals or abrasions. This simple step can help prevent chipping, dulling, and premature wear of your gradient nails.
- Removal
When the time comes to bid farewell to your gradient nail art, follow these gentle steps to ensure a safe and seamless removal process:
- Soak: Begin by soaking a cotton pad in acetone-based nail polish remover. Place the soaked pad on your nail and gently press down, allowing the remover to penetrate the layers of polish and dissolve them effectively.
- Wait: Patience is key during the removal process. Allow the acetone-based remover to work its magic for a few minutes, softening the polish and making it easier to remove without excessive rubbing or scrubbing.
- Wipe Away: After allowing the remover to work its magic, gently wipe away the dissolved polish using the soaked cotton pad. Be sure to use gentle, sweeping motions to avoid damaging the nail surface or surrounding skin.
- Nourish and Hydrate: Once your nails are free of polish, it’s time to nourish and hydrate them. Apply a generous amount of cuticle oil or hand cream to replenish moisture and keep your nails healthy and strong.
By following these simple maintenance and removal techniques, you can ensure that your gradient nails remain as stunning and vibrant as the day they were created, ready for your next nail art adventure.
- Summary and FAQs
In summary, mastering gradient nails is a journey of creativity, experimentation, and self-expression. Whether you’re a seasoned nail artist or a newcomer to the world of nail art, there’s something magical about the process of blending colors to create a stunning gradient effect. If you ever find yourself in need of guidance or inspiration, our comprehensive FAQ section is here to help answer your questions and provide tips and tricks to make your nail art journey as enjoyable and rewarding as possible.
So go ahead, dear reader, and let your creativity run wild. With gradient nails, the possibilities are endless—and the results are always breathtaking.
Happy painting!