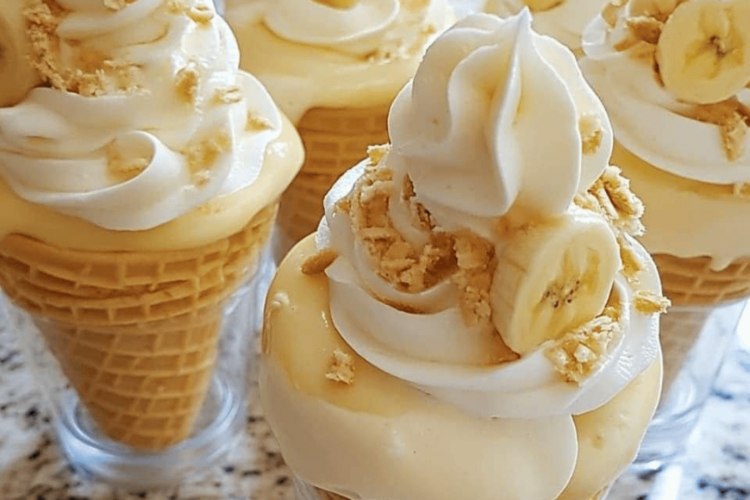
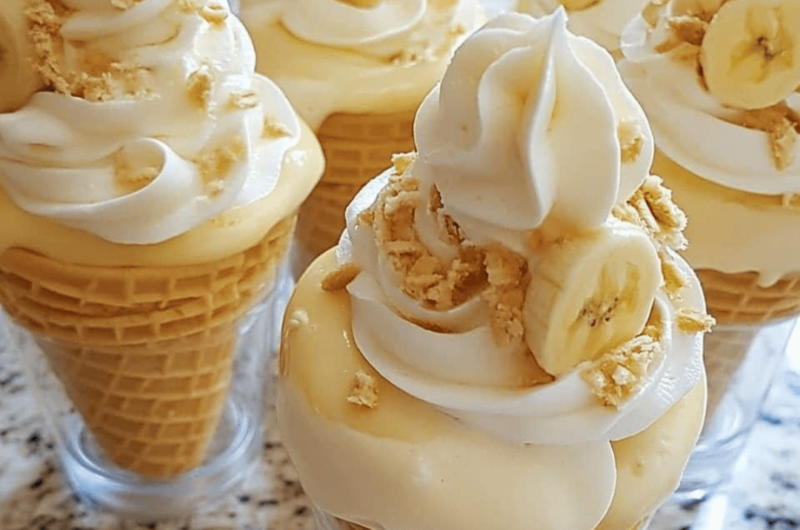
If you love banana pudding and ice cream, this recipe is a dreamy fusion of both! Banana Pudding Ice Cream Cones take the classic Southern dessert and give it a modern, handheld twist by assembling it in crispy waffle cones. With creamy banana pudding, fresh banana slices, fluffy whipped topping, and crunchy vanilla wafers, these cones offer the perfect combination of flavors and textures in every bite.
These treats are ideal for hot summer days, backyard gatherings, or just when you’re craving something sweet, refreshing, and fun. Easy to assemble and absolutely delightful to eat, Banana Pudding Ice Cream Cones are bound to become a favorite among both kids and adults.
Let’s take a closer look at how to make these Banana Pudding Ice Cream Cones, with detailed steps, pro tips, and creative variations to make them even more exciting!
Jump to RecipeWhy You’ll Love Banana Pudding Ice Cream Cones ❤️
- A Fun Take on a Classic Dessert: Banana pudding is already a beloved dessert, but serving it in ice cream cones takes it to another level of fun and convenience. It’s a no-mess, handheld treat that’s perfect for casual get-togethers.
- Easy and Quick to Make: With just a handful of ingredients and no need for baking or cooking, this recipe comes together in just 15 minutes.
- Customizable: From swapping out the vanilla wafers for graham crackers to adding your own favorite toppings, these cones can be personalized to suit your taste.
- Perfect for All Ages: Whether you’re making these for a family picnic, a kids’ party, or as a quick after-dinner dessert, these cones are sure to please everyone.
- Great for Summer: The chilled banana pudding and ice cream cones make for a refreshing dessert that’s especially fitting during warm weather.
Ingredients for Banana Pudding Ice Cream Cones 📝
Here’s a breakdown of what you’ll need to create this fun and flavorful dessert:
For the Banana Pudding 🍌
1. Instant Banana Pudding Mix (1 package, 3.4 oz) 🥄
- This is the base of your dessert. The instant banana pudding mix adds that authentic banana flavor and creamy texture to the cones. You’ll only need one package, and it comes together in minutes.
2. Cold Milk (2 cups) 🥛
- Cold milk is used to prepare the instant pudding mix. Make sure the milk is cold to help the pudding set properly. Whole milk works best for a creamier texture, but you can use any milk you have on hand.
3. Whipped Topping (1 cup) 🍨
- The whipped topping is folded into the banana pudding to give it an extra light and fluffy texture. You can use store-bought whipped topping or make your own whipped cream by whipping heavy cream with a bit of sugar.
4. Bananas (2, sliced) 🍌
- Fresh banana slices are layered into the cones for a burst of real banana flavor. Choose ripe bananas for the sweetest, creamiest texture.
For the Assembly 🍦
1. Waffle Cones (6-8 cones) 🍦
- Waffle cones are the base of this dessert. Their crispy texture contrasts beautifully with the creamy banana pudding, making them the perfect edible container for this treat.
2. Crushed Vanilla Wafers or Graham Crackers (1/2 cup) 🍪
- A sprinkle of crushed vanilla wafers or graham crackers adds a bit of crunch and nostalgic flavor to these cones. Either option works, depending on your preference.
3. Extra Whipped Topping (for piping) 🍨
- You’ll want to add an extra swirl of whipped topping on top of the cones for that classic banana pudding look. Plus, it adds an extra layer of creamy goodness.
4. Banana Slices (for garnish) 🍌
- Top each cone with a slice of banana for a decorative and delicious garnish.
Step-by-Step Directions 🧁
Ready to make these delightful cones? Let’s go through the step-by-step process of how to assemble your Banana Pudding Ice Cream Cones:
Step 1: Prepare the Banana Pudding 🍮
- In a large mixing bowl, whisk together the instant banana pudding mix and cold milk for about 2 minutes, or until smooth and thick. The pudding should be creamy but thick enough to hold its shape in the cones.
Pro Tip:
- Make sure to whisk the pudding mix thoroughly to avoid any lumps. Instant pudding sets quickly, so work fast once you’ve mixed in the milk.
- Let the pudding sit for 5 minutes to set. This will ensure that it thickens properly and is ready for the next step.
Step 2: Fold in the Whipped Topping 🍨
- Once the pudding has thickened, gently fold in 1 cup of whipped topping. This will lighten the pudding, making it fluffier and creamier for the cones.
Pro Tip:
- Use a spatula to fold in the whipped topping gently. You don’t want to stir it too vigorously, as that can deflate the whipped topping and make the pudding less airy.
Step 3: Layer Banana Slices in the Cones 🍌
- Slice 2 bananas into thin rounds. Place a few banana slices at the bottom of each waffle cone. The fresh bananas will add a burst of flavor and texture to each bite, complementing the creamy pudding perfectly.
Pro Tip:
- For an extra touch of sweetness, you can toss the banana slices in a little bit of sugar or honey before adding them to the cones.
Step 4: Fill the Cones with Banana Pudding 🍦
- Spoon or pipe the banana pudding into the waffle cones, filling them up to the top. You can use a piping bag with a large round tip for a neater presentation, or simply spoon the pudding in if you prefer a more rustic look.
Pro Tip:
- If you don’t have a piping bag, you can easily make one by snipping the corner off of a resealable plastic bag. This will give you more control over filling the cones neatly.
Step 5: Add a Swirl of Whipped Topping 🍨
- Top each cone with a generous swirl of extra whipped topping. This not only looks beautiful but also adds another layer of creamy sweetness to the dessert.
Pro Tip:
- For a professional look, use a star tip with your piping bag to create a decorative swirl of whipped topping on each cone.
Step 6: Sprinkle with Crushed Vanilla Wafers 🍪
- Sprinkle crushed vanilla wafers or graham crackers over the whipped topping. The crunchy wafers add texture and that classic banana pudding flavor we all love.
Pro Tip:
- For a flavor boost, you can lightly toast the crushed wafers or graham crackers in a skillet for a few minutes before adding them to the cones. This will give them an extra nutty, caramelized flavor.
Step 7: Garnish and Serve 🍌
- Garnish each cone with a slice of banana on top. This adds a fresh, fruity touch and makes the cones look even more appealing.
Pro Tip:
- Serve the cones immediately for the best texture. If you’re not serving them right away, chill the filled cones in the refrigerator for a few minutes to keep them cold and firm.
Tips for the Perfect Banana Pudding Ice Cream Cones 🛠️
Here are some additional tips to help you achieve the best results when making these delicious Banana Pudding Ice Cream Cones:
- Chill the Cones Before Serving: If you’re making these cones in advance, you can refrigerate the filled cones for up to 1 hour before serving. This will keep the pudding cool and the whipped topping fresh.
- Choose the Right Bananas: Make sure to use ripe bananas that are soft and sweet, but not overly mushy. Overripe bananas may turn too soft in the pudding and create a mushy texture.
- Pipe for Precision: Using a piping bag for the pudding and whipped topping makes for a cleaner presentation. It also helps you fill the cones evenly and gives the finished product a more polished look.
- Watch Out for Soggy Cones: If you’re worried about the waffle cones becoming soggy, you can lightly coat the inside of each cone with melted chocolate before adding the banana slices. This creates a barrier that helps prevent the cones from getting too soft.
Banana Pudding Ice Cream Cones
6-8 cones
servings15
minutes250 per cone
kcal15
minutesThese creamy cones are packed with banana pudding, whipped topping, and crushed wafers. The perfect combination of flavors and textures will leave you craving more. Enjoy these special occasion treats for a satisfying snack.
Ingredients
- For the Banana Pudding:
- 1 package (3.4 oz) instant banana pudding mix
- 2 cups cold milk
- 1 cup whipped topping (or whipped cream)
- 2 bananas, sliced
- For the Assembly:
- 6-8 waffle cones
- 1/2 cup crushed vanilla wafers or graham crackers
- Extra whipped topping for piping
- Banana slices for garnish
Directions
- In a large mixing bowl, whisk together the instant banana pudding mix and cold milk until smooth and thick, about 2 minutes. Let it sit for 5 minutes to set.
- Once the pudding has thickened, gently fold in 1 cup of whipped topping until fully incorporated.
- Place a few banana slices at the bottom of each waffle cone.
- Spoon or pipe the banana pudding into the waffle cones, filling them up to the top.
- Add a generous swirl of whipped topping on top of each cone, then sprinkle crushed vanilla wafers or graham crackers over the whipped topping.
- Garnish each cone with a slice of banana on top.
- Serve immediately or chill for a few minutes to let the flavors meld.
Creative Variations 🎨
While the classic banana pudding flavor is delicious on its own, there are plenty of ways to customize and put your own spin on this recipe. Here are a few fun variations to try:
1. Banana Split Cones 🍒🍍🍫
Turn your cones into a banana split by adding toppings like:
- Crushed peanuts
- Maraschino cherries
- Chocolate or caramel drizzle
- Pineapple chunks
Simply layer these toppings over the whipped cream for a decadent twist on the traditional banana split.
2. Peanut Butter Banana Cones 🥜🍌
For all the peanut butter lovers out there, try adding:
- Peanut butter drizzle over the whipped topping
- Crushed peanut butter cookies instead of vanilla wafers
The salty-sweet combination of peanut butter and banana is a match made in dessert heaven!
3. Chocolate Banana Pudding Cones 🍫🍌
If you’re a chocoholic, try adding:
- Chocolate chips sprinkled on top of the whipped cream
- Chocolate syrup drizzle for extra indulgence
- Crushed chocolate wafer cookies instead of vanilla wafers

