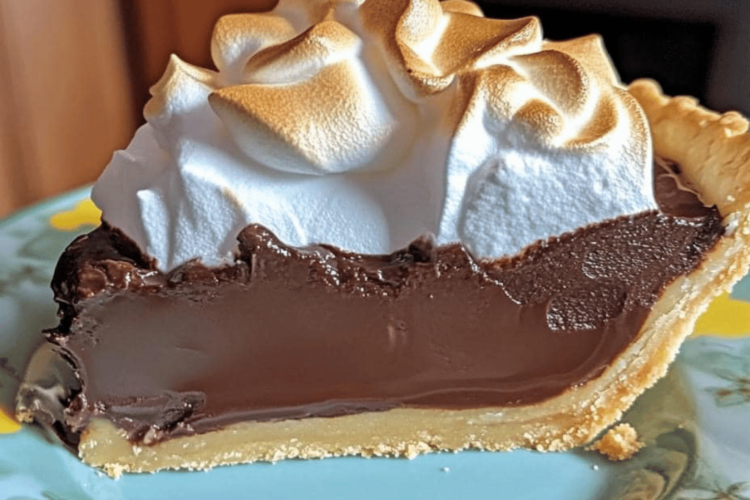
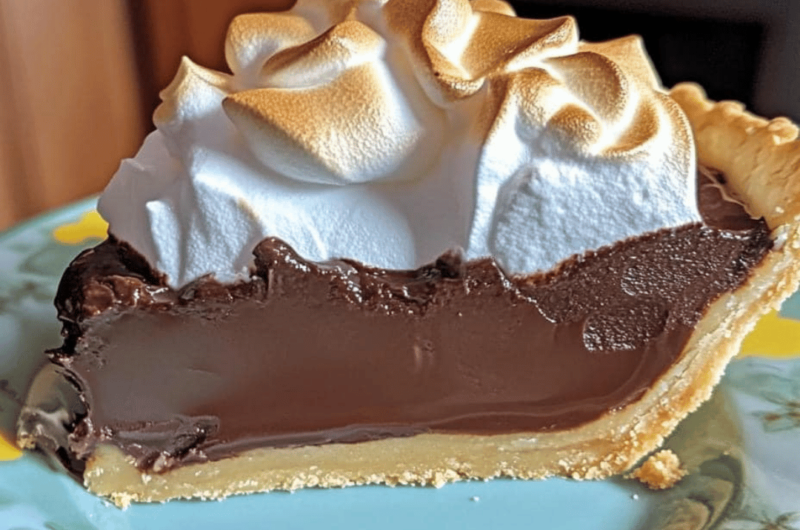
Chocolate pie with golden meringue is a dessert steeped in nostalgia a recipe that brings to mind cozy kitchens, family gatherings, and the sweet indulgence of a homemade treat. This old-fashioned chocolate pie combines a rich, creamy filling with a perfectly baked crust and a light, fluffy meringue topping that turns a warm, golden brown in the oven. It’s simple enough for weeknight desserts and elegant enough to shine as the star of holiday tables. Let’s dive into the details of crafting this timeless masterpiece.
Jump to RecipeWhy You’ll Fall in Love with This Recipe
- Nostalgic Comfort: This recipe takes you back to a simpler time when desserts were made from scratch with love and care.
- Rich Chocolate Flavor: A creamy cocoa filling strikes the perfect balance between sweetness and depth.
- Golden, Fluffy Meringue: The light topping adds an airy, slightly sweet contrast to the dense chocolate filling.
- Versatility: Perfect for casual dinners, special occasions, or as a nostalgic gift.
Ingredients for Success
Every component of this pie from the crust to the meringue brings its own magic. Here’s what you’ll need:
For the Pie Filling
- 1 pie crust, baked: Whether store-bought or homemade, the crust is the foundation of this pie.
- 1/4 cup butter: Adds richness to the filling.
- 1 cup sugar: Provides sweetness and balance.
- 1/4 cup flour: Thickens the filling to the perfect creamy texture.
- 1/2 cup cocoa powder: Delivers a deep chocolate flavor.
- 2 cups milk: Creates a smooth, silky filling; whole milk works best.
- 3 egg yolks: Adds structure and richness to the custard.
- 1 tsp vanilla extract: Enhances the flavor with a subtle, warm aroma.
For the Meringue
- 3 egg whites: Whipped to create a light, airy topping.
- 1/4 tsp cream of tartar: Stabilizes the egg whites for a fluffy meringue.
- 1/2 cup sugar: Sweetens and helps create stiff, glossy peaks.
Step-by-Step Guide to Chocolate Pie Perfection
Step 1: Preparing the Crust
- Preheat your oven according to the instructions for your pie crust recipe or package.
- Roll out your pie dough and fit it into a standard 9-inch pie pan. Crimp or flute the edges for a decorative finish.
- Use a fork to prick the bottom of the crust, preventing bubbles. Line with parchment paper and fill with pie weights or dried beans.
- Bake until lightly golden and set, about 10-12 minutes. Remove from the oven and allow it to cool completely.
Pro Tip: A homemade crust will add a rustic, buttery touch to your pie, but a store-bought crust works wonderfully for saving time.
Step 2: Crafting the Chocolate Filling
- In a medium saucepan, combine cocoa powder, sugar, flour, and milk. Whisk until smooth to prevent lumps.
- Add egg yolks and butter to the saucepan.
- Place the pan over medium heat and cook, stirring constantly, until the mixture thickens. This may take 8-10 minutes. The filling should coat the back of a spoon.
- Remove from heat and stir in vanilla extract.
- Pour the hot filling into the baked pie crust, spreading it evenly.
Pro Tip: For a silkier filling, strain it through a fine-mesh sieve before pouring it into the crust.
Step 3: Making the Golden Meringue
- In a clean mixing bowl, beat egg whites and cream of tartar on medium speed until soft peaks form. Soft peaks will droop slightly when you lift the beaters.
- Gradually add sugar, one tablespoon at a time, beating continuously. Increase the speed to high and beat until stiff peaks form. Stiff peaks will stand upright without drooping.
- Spoon the meringue over the chocolate filling, making sure to spread it to the edges of the crust. This seals the meringue and prevents shrinking.
- Use the back of a spoon to create decorative swirls or peaks in the meringue.
Step 4: Baking and Cooling
- Preheat your oven to 350°F (175°C).
- Bake the pie for 10-15 minutes, or until the meringue is golden brown. Watch closely to avoid overbaking.
- Remove the pie from the oven and let it cool completely at room temperature. This ensures the filling sets and slices cleanly.
Pro Tip: For best results, refrigerate the pie for at least 2 hours before serving.
The Science Behind the Perfect Meringue
Making meringue can feel like an art, but it’s also a science:
- Egg Whites: Room-temperature egg whites whip up faster and achieve more volume.
- Cream of Tartar: This acidic ingredient stabilizes the egg whites, ensuring your meringue holds its shape.
- Gradual Sugar Addition: Adding sugar slowly allows it to dissolve, creating a smooth and glossy meringue.
Variations on Chocolate Pie
While this recipe is a classic, there’s always room for creativity:
Flavor Boosters
- Espresso Kick: Add a teaspoon of instant espresso powder to the filling for a mocha twist.
- Peppermint Delight: Stir in ½ teaspoon of peppermint extract for a holiday-ready pie.
- Bourbon Infusion: Mix a tablespoon of bourbon into the filling for a sophisticated flavor.
Different Toppings
- Coconut Meringue: Fold in toasted coconut flakes for a tropical flair.
- Whipped Cream: Swap the meringue for dollops of sweetened whipped cream.
Crust Options
- Graham Cracker Crust: For a no-fuss alternative, use a graham cracker crust.
- Chocolate Cookie Crust: Crush chocolate wafers or Oreos for a rich, complementary base.
Serving Suggestions
Chocolate pie is a showstopper on its own, but pairing it with the right accompaniments can elevate your dessert game:
- Garnish: Sprinkle the pie with shaved chocolate or cocoa powder for a touch of elegance.
- Beverages: Pair with a cup of coffee, a glass of milk, or a dessert wine.
- Sides: Serve alongside fresh berries or a scoop of vanilla ice cream for contrast.
Storage Tips
- Refrigeration: Store leftover pie in the refrigerator, covered loosely with plastic wrap, for up to 3 days.
- Freezing: Chocolate pies without meringue freeze well. Wrap tightly and freeze for up to 2 months. Thaw overnight in the refrigerator before serving.
Troubleshooting Tips
Even seasoned bakers encounter challenges. Here’s how to handle common issues:
- Runny Filling: Ensure the filling is cooked until thick and pudding-like before pouring it into the crust.
- Weeping Meringue: Spread the meringue over hot filling to help it adhere and prevent water from forming underneath.
- Overcooked Meringue: Watch the oven closely; golden peaks form quickly and can burn if left too long.
Why This Recipe Stands the Test of Time
Old-fashioned chocolate pie with golden meringue is more than a dessert—it’s a memory-maker. Its rich, velvety filling and fluffy topping are timeless, embodying the warmth of homemade baking. Whether you’re continuing a family tradition or starting a new one, this recipe is sure to bring smiles and sweet satisfaction to your table.
Old Fashioned Chocolate Pie with Golden Meringue
This rich and decadent pie is topped with a fluffy meringue. The perfect combination of flavors and textures will leave you craving more. Enjoy this special occasion treat for a satisfying dessert.
Ingredients
- For the Pie Filling:
1 pie crust, baked
1/4 cup butter
1 cup sugar
1/4 cup flour
1/2 cup cocoa powder
2 cups milk
3 egg yolks
1 tsp vanilla extract
- For the Meringue:
3 egg whites
1/4 tsp cream of tartar
1/2 cup sugar
Directions
- Bake your pie crust according to package or recipe instructions, then set it aside to cool.
- In a medium saucepan, whisk together cocoa, sugar, flour, and milk. Add in the egg yolks and butter, and cook over medium heat, stirring constantly until the mixture thickens into a creamy filling. Pour it into the baked pie crust.
- Beat the egg whites and cream of tartar in a mixing bowl until soft peaks form. Gradually add sugar and continue beating until stiff peaks form.
- Spoon the meringue over the chocolate filling, spreading it to the edges of the crust. Bake at 350°F (175°C) for 10-15 minutes, until the meringue turns golden brown.
- Let the pie cool completely before serving.
So, roll up your sleeves, preheat your oven, and treat yourself to a slice of culinary nostalgia. Your taste buds will thank you! 🍫🥧

