There’s something magical about the smell of cookies baking in the oven. The rich aroma of butter and sugar, the sight of melted chocolate chips oozing from soft, golden-brown cookies, and that first warm, gooey bite—it’s a memory we all treasure. And at the heart of these moments is Grandma’s Classic Chocolate Chip Cookies.
This recipe has stood the test of time, with its perfect balance of crisp edges and soft centers. Whether you’re baking for a family gathering, a school bake sale, or simply to satisfy your sweet tooth, these cookies deliver every single time. Let’s dive into this timeless classic and explore what makes them so special.
Jump to RecipeWhy Grandma’s Recipe is the Best
- Time-Tested Perfection: Generations have enjoyed these cookies, proving that simple, high-quality ingredients create unbeatable results.
- Rich and Buttery Flavor: With a combination of white and brown sugars, these cookies boast a depth of flavor that’s hard to resist.
- Soft, Chewy Texture: The addition of dissolved baking soda and hot water ensures the perfect texture every time.
- Customizable: Love nuts or extra chocolate chips? This recipe is easy to tweak to suit your preferences.
Ingredients You’ll Need
For the Dough:
- 1 cup butter, softened: The foundation of a rich, creamy dough.
- 1 cup white sugar: Adds sweetness and helps create a crisp edge.
- 1 cup packed brown sugar: Brings moisture and a caramel-like flavor.
- 2 eggs: Binds the ingredients together while adding richness.
- 2 teaspoons vanilla extract: Enhances the flavor and pairs beautifully with the chocolate.
- 3 cups all-purpose flour: Forms the structure of the cookie.
- 1 teaspoon baking soda: Provides lift and a light texture.
- 2 teaspoons hot water: Activates the baking soda for a perfectly soft and chewy cookie.
- 1/2 teaspoon salt: Balances the sweetness.
- 2 cups semisweet chocolate chips: The stars of the show, creating gooey chocolate pockets in every bite.
Optional Additions:
- 1/2 cup chopped nuts: Walnuts or pecans are a great choice for added crunch.
Step-by-Step Instructions
Step 1: Preheat Your Oven
Preheat your oven to 350°F (175°C). This ensures an even temperature for consistent baking.
Step 2: Cream the Butter and Sugars
In a large mixing bowl, cream together the softened butter, white sugar, and brown sugar until the mixture is light and fluffy. This step is crucial for incorporating air into the dough, which helps the cookies rise evenly.
Step 3: Add Eggs and Vanilla
Beat in the eggs one at a time, ensuring each is fully incorporated before adding the next. Stir in the vanilla extract to infuse the dough with its sweet aroma.
Step 4: Dissolve Baking Soda
In a small bowl, dissolve the baking soda in hot water. This not only activates the baking soda but also helps create that soft and chewy texture we all love. Add this mixture to the dough along with the salt, stirring well.
Step 5: Mix in the Dry Ingredients
Gradually add the all-purpose flour, mixing until just combined. Be careful not to overmix, as this can result in tough cookies.
Step 6: Fold in Chocolate Chips
Gently fold in the semisweet chocolate chips. If you’re feeling adventurous, this is also the time to add chopped nuts or even white chocolate chips for a fun twist.
Step 7: Portion the Dough
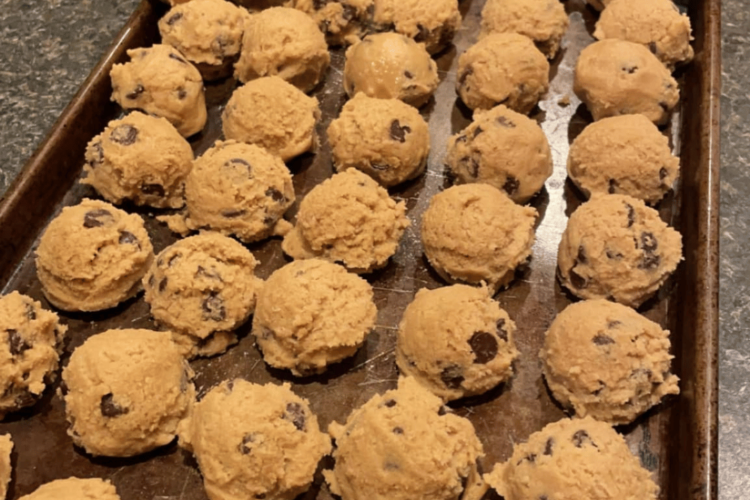
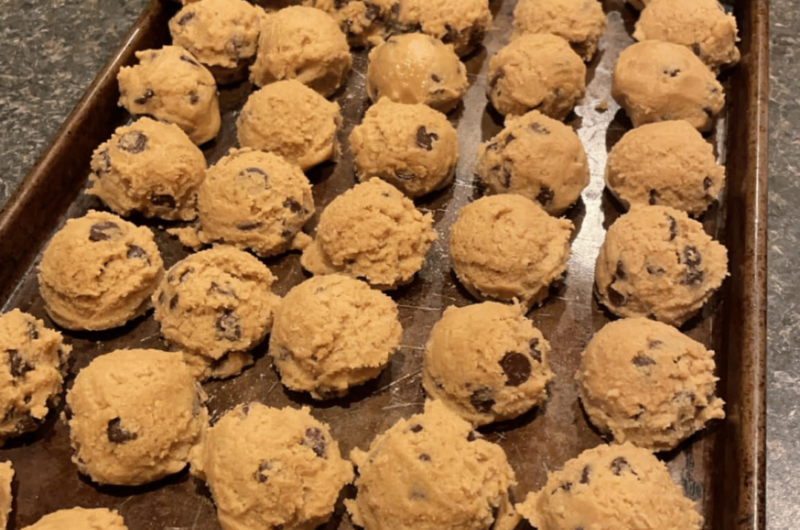
Using a large spoon or cookie scoop, drop rounded spoonfuls of dough onto an ungreased baking sheet. For uniform cookies, try to keep the sizes consistent.
Step 8: Bake to Perfection
Place the baking sheet in your preheated oven and bake for 10-14 minutes. The cookies are done when the edges are lightly browned, and the centers look slightly underbaked they’ll continue to set as they cool.
Step 9: Cool and Enjoy
Allow the cookies to cool on the baking sheet for a few minutes before transferring them to a wire rack to cool completely. If you can’t resist, enjoy one warm for the ultimate experience!
Tip: For the best results, freeze the dough overnight and bake the cookies the next day. Freezing enhances the flavor and gives the cookies a chewier texture.
Why Freezing the Dough Works
Freezing cookie dough before baking has several benefits:
- Enhanced Flavor: Resting the dough allows the sugars and butter to meld, creating a richer taste.
- Better Texture: Chilled dough spreads less, resulting in thicker, chewier cookies.
- Convenience: You can bake only what you need, keeping the rest of the dough ready for later.
Tips for Success
- Use Quality Ingredients: Fresh butter, high-quality vanilla extract, and good chocolate chips make a noticeable difference.
- Room Temperature Butter: Softened butter creams better with sugar, ensuring a smooth dough.
- Don’t Overmix: Once the flour is added, mix only until combined to avoid tough cookies.
- Watch the Bake Time: Every oven is different, so keep an eye on your cookies. They’re done when the edges are golden, and the centers are slightly soft.
Variations to Try
- Double Chocolate: Replace 1/4 cup of flour with cocoa powder for a rich chocolate base.
- Sea Salt Sprinkle: Add a pinch of flaky sea salt to the tops of the cookies before baking for a sweet and salty contrast.
- Oatmeal-Chocolate Chip: Substitute 1 cup of flour with rolled oats for added texture and a hearty flavor.
- Peanut Butter Twist: Swirl in 1/2 cup of creamy peanut butter before adding the chocolate chips.
Serving Suggestions
- Classic Pairing: Serve warm with a cold glass of milk.
- Ice Cream Sandwiches: Use two cookies to sandwich your favorite ice cream flavor.
- Cookie Crumble Topping: Crumble cookies over a bowl of ice cream or yogurt for an indulgent topping.
- Gift-Worthy: Stack a few cookies in a clear bag tied with a ribbon for a thoughtful homemade gift.
Storage Tips
- Room Temperature: Store cookies in an airtight container for up to one week.
- Freezer: Freeze baked cookies in a single layer, then transfer to a resealable bag for up to three months. To enjoy, let them thaw at room temperature or warm in the oven.
- Unbaked Dough: Portion the dough onto a baking sheet, freeze until solid, then store the dough balls in a freezer bag. Bake straight from frozen, adding 1-2 extra minutes to the bake time.
Nutritional Information
| Serving Size | 1 cookie (based on 24 cookies) |
|---|---|
| Calories | ~200 kcal |
| Fat | ~10g |
| Carbs | ~28g |
| Protein | ~2g |
A Sweet Bite of Nostalgia
Grandma’s Classic Chocolate Chip Cookies aren’t just a dessert they’re a piece of history, a family tradition, and a comforting reminder of the simple joys in life. Whether you’re baking them for a special occasion or as a weekend treat, these cookies are sure to delight.
So grab your mixing bowl, preheat your oven, and let the irresistible aroma of freshly baked cookies fill your kitchen. With every bite, you’ll taste the love and warmth that only a classic family recipe can bring. Happy baking!
Grandma’s Classic Chocolate Chip Cookies
These chewy cookies are packed with chocolate chips. The perfect combination of flavors and textures will leave you craving more. Enjoy these special occasion treats for a satisfying dessert.
Ingredients
1 cup butter, softened
1 cup white sugar
1 cup packed brown sugar
2 eggs
2 teaspoons vanilla extract
3 cups all-purpose flour
1 teaspoon baking soda
2 teaspoons hot water
1/2 teaspoon salt
2 cups semisweet chocolate chips
Directions
- Preheat oven to 350 degrees F (175 degrees C).
- Cream together the butter, white sugar, and brown sugar until smooth. Beat in the eggs one at a time, then stir in the vanilla. Dissolve baking soda in hot water. Add to batter along with salt. Stir in flour, chocolate chips, and nuts. Drop by large spoonfuls onto ungreased pans.
- Bake for about 10-14 minutes in the preheated oven, or until edges are nicely browned.
- For best results freeze overnight and bake them the next day.

