
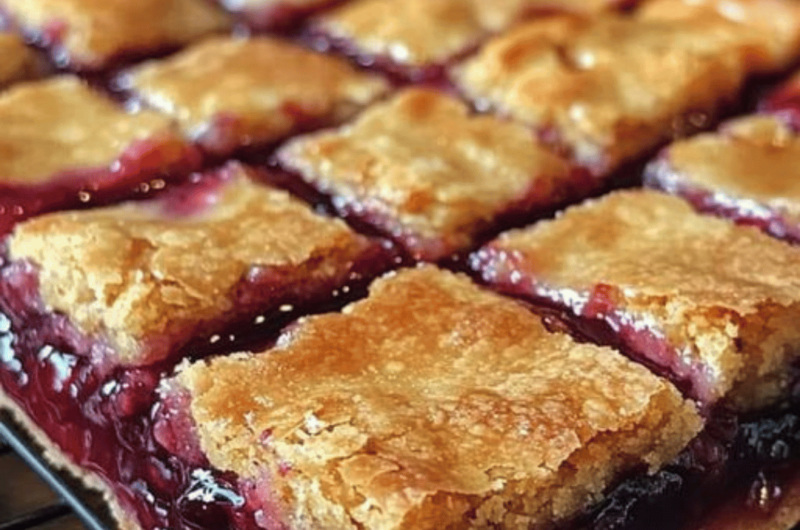
If you love the comforting, nostalgic flavors of cherry pie but don’t feel like fussing with a traditional pie crust, these Cherry Pie Bars are the answer to your dessert dreams. With a buttery base, juicy cherry filling, and a light, sweet glaze drizzled on top, these bars offer all the deliciousness of a cherry pie but in an easy-to-make, hand-held form. They’re perfect for parties, potlucks, or simply enjoying at home with a cup of coffee or tea.
Jump to RecipeWhy You’ll Love These Cherry Pie Bars
- Easy to Make: You don’t need to roll out a pie crust or worry about lattice work. These bars come together quickly with a simple dough and a can of cherry pie filling.
- Perfect for Sharing: Since these are baked in a large pan and cut into bars, they’re great for feeding a crowd at your next gathering.
- Flavor-Packed: The combination of the tart cherry pie filling with the sweet, buttery dough and a hint of almond in the glaze makes these bars irresistibly good.
- Customizable: Swap out the cherry pie filling for your favorite fruit filling, like blueberry or apple, to create your own variation of these bars!
Ready to bake? Let’s dive into the details of how to whip up these delightful bars.
Ingredients You’ll Need
Here’s everything you need to create these Cherry Pie Bars:
- 1 cup butter, softened 🧈 – Butter is the base of the dough, giving it that rich, buttery flavor we love.
- 2 cups sugar 🍬 – Sweetens the dough and helps create a tender texture.
- 4 eggs 🥚 – The eggs provide structure and moisture to the dough.
- 1 tsp vanilla extract 🍦 – Adds a warm, sweet flavor to the dough.
- ¼ tsp almond extract 🌰 – The secret to that classic cherry-almond combo.
- 3 cups all-purpose flour 🌾 – This gives the dough its structure.
- 1 tsp salt 🧂 – A little salt helps balance the sweetness and enhances the flavors.
- 2 cans (21 oz each) cherry pie filling 🍒 – The star of the show! Tart cherries bring a burst of juicy flavor to each bite.
- 1 cup powdered sugar 🍥 – For the sweet glaze on top.
- ½ tsp vanilla extract (for glaze) 🍦 – Enhances the flavor of the glaze.
- ½ tsp almond extract (for glaze) 🌰 – Adds that subtle almond flavor to the glaze, complementing the cherries.
- 2 tbsp milk 🥛 – To thin the glaze so it drizzles beautifully over the bars.
Step-by-Step Directions for Cherry Pie Bars
1. Preheat the Oven 🍽️
Start by preheating your oven to 350°F (175°C). Spray a 15x10x1-inch baking pan with non-stick spray or line it with parchment paper for easy removal later. If you’re using a 9×13-inch pan, it will work just fine just be aware that the baking time might be a little longer since the bars will be thicker.
2. Cream the Butter and Sugar 🍯
In a large mixing bowl, cream together 1 cup of softened butter and 2 cups of sugar until the mixture is light and fluffy. This step is key for creating a tender and moist bar base.
3. Add the Eggs 🍳
Next, beat in 4 eggs, adding them one at a time. Make sure each egg is fully incorporated before adding the next. This helps create a smooth, even batter. Once all the eggs are mixed in, stir in 1 teaspoon of vanilla extract and ¼ teaspoon of almond extract. The almond extract will add a lovely hint of flavor that pairs perfectly with the cherry filling.
4. Combine the Dry Ingredients 🌾
In a separate bowl, whisk together 3 cups of all-purpose flour and 1 teaspoon of salt. Gradually add this flour mixture to your creamed butter and sugar, mixing until well combined. You should end up with a thick, smooth batter that will serve as both the base and the topping for your cherry pie bars.
5. Assemble the Bars 🍒
Now comes the fun part—assembling your bars! Spread 3 cups of the batter evenly over the bottom of your prepared baking pan. This will create a sturdy base for the cherry pie filling.
Next, open your 2 cans of cherry pie filling and spread the filling evenly over the dough. Use a spatula to make sure the cherries are spread out and covering the entire surface.
Finally, drop spoonfuls of the remaining batter over the cherry pie filling. Don’t worry about spreading it perfectly some of the cherry filling should peek through the gaps, giving the bars a rustic look.
6. Bake the Bars 🕒
Place the pan in your preheated oven and bake for 30-35 minutes, or until a toothpick inserted into the center of the bars comes out clean. If you’re using a 9×13-inch pan, you may need to bake the bars a bit longer to ensure the center is fully set.
Once baked, remove the pan from the oven and allow the bars to cool completely on a wire rack before adding the glaze.
7. Prepare the Glaze 🍥
While the bars are cooling, it’s time to make the glaze! In a small bowl, whisk together 1 cup of powdered sugar, ½ teaspoon of vanilla extract, ½ teaspoon of almond extract, and 2 tablespoons of milk. Stir until the glaze is smooth and has a drizzle-able consistency. If the glaze is too thick, add a tiny splash of milk; if it’s too thin, add a bit more powdered sugar.
8. Drizzle the Glaze and Serve 🍽️
Once the bars are completely cooled, drizzle the glaze over the top using a spoon or fork. Let the glaze set for a few minutes, then cut the bars into squares and serve!
Tips for Making the Best Cherry Pie Bars
- Use Room Temperature Butter: This ensures the butter creams smoothly with the sugar, resulting in a light and fluffy texture.
- Customize the Filling: While cherry is a classic, feel free to experiment with other pie fillings like blueberry, apple, or raspberry. You can even make your own fruit filling if you prefer!
- Gluten-Free Option: You can easily make these bars gluten-free by swapping the all-purpose flour for a gluten-free flour blend.
What to Serve with Cherry Pie Bars
These bars are delicious on their own, but you can pair them with:
- Whipped Cream or Ice Cream: For an extra indulgent treat, serve the bars with a dollop of whipped cream or a scoop of vanilla ice cream.
- Coffee or Tea: Enjoy these bars as an afternoon snack or dessert with a warm beverage.
Why These Cherry Pie Bars Are a Winner 🍒🏆
There’s something so comforting about cherry pie, and these Cherry Pie Bars take all the best parts of the pie and turn them into an easy-to-make, shareable dessert. The buttery base, sweet-tart cherry filling, and light glaze combine to create a dessert that’s perfect for any occasion, from casual family dinners to special gatherings.
Whether you’re a pie lover or just looking for a simple yet delicious dessert, these bars are sure to satisfy. Plus, they’re versatile and customizable, making them a great go-to recipe for bakers of all skill levels.
Cherry Pie Bars
These buttery bars are packed with sweet cherry filling and a creamy glaze. The perfect combination of flavors and textures will leave you craving more. Enjoy these special occasion treats for a satisfying dessert.
Ingredients
1 cup butter, softened
2 cups sugar
4 eggs
1 tsp vanilla extract
¼ tsp almond extract
3 cups all-purpose flour
1 tsp salt
2 cans (21 oz each) cherry pie filling
1 cup powdered sugar
½ tsp vanilla extract (for glaze)
½ tsp almond extract (for glaze)
2 tbsp milk
Directions
- Preheat Oven:
- Set your oven to 350°F (175°C). Spray a 15x10x1-inch pan with non-stick spray.
- Cream Butter & Sugar:
- In a large mixing bowl, cream together the softened butter and sugar until light and fluffy.
- Add Eggs:
- Beat in the eggs one at a time, ensuring each one is fully incorporated before adding the next. Stir in the vanilla and almond extracts.
- Combine Dry Ingredients:
- In a separate bowl, whisk together the flour and salt. Gradually add this dry mixture to the creamed butter and sugar, mixing until well combined.
- Assemble Bars:
- Spread 3 cups of the batter evenly over the bottom of the prepared pan. Top with the cherry pie filling, spreading it evenly. Drop spoonfuls of the remaining batter over the cherry filling.
- Bake:
- Bake for 30-35 minutes, or until a toothpick inserted into the center comes out clean. If using a 9x13-inch pan, adjust the baking time accordingly (may take longer).
- Cool:
- Let the bars cool completely on a wire rack.
- Prepare Glaze:
- In a small bowl, whisk together the powdered sugar, vanilla extract, almond extract, and milk until smooth.
- Drizzle & Serve:
- Once the bars are cooled, drizzle the glaze over the top. Let the glaze set, then cut into squares and serve.
Conclusion
Cherry Pie Bars are the ultimate blend of simplicity and deliciousness. They capture all the cozy, nostalgic flavors of a cherry pie without the hassle of making a crust. With a soft, buttery base, a sweet and tangy cherry filling, and a smooth glaze drizzled on top, these bars are bound to be a hit at any gathering or as a special treat for yourself. So go ahead, bake a batch and enjoy the sweet, comforting taste of cherry pie in a new, easy-to-enjoy form!