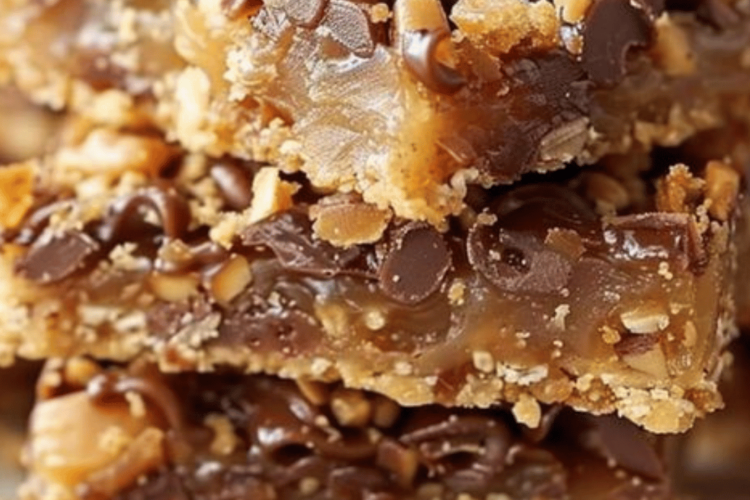
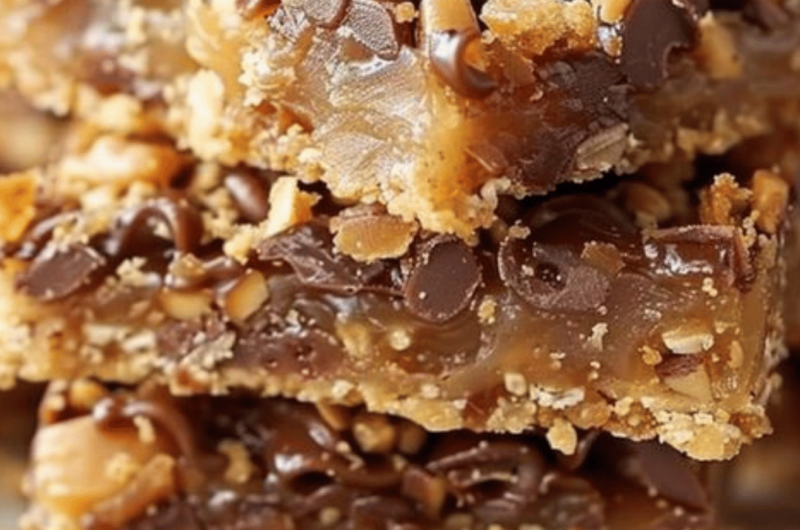
If you’re looking for a dessert that’s super simple yet absolutely irresistible, these Cake Mix Toffee Bars are calling your name! With layers of rich, buttery cake, crunchy toffee, and smooth chocolate, these bars will satisfy any sweet tooth in no time. The best part? You only need a handful of ingredients and minimal effort to create a treat that tastes like you spent hours in the kitchen.
So, grab your mixing bowl and let’s get started on this delightful dessert that’s perfect for parties, potlucks, or just because you deserve a sweet treat.
Jump to RecipeWhy You’ll Love These Cake Mix Toffee Bars
- Simple Ingredients: All you need are some pantry staples cake mix, butter, chocolate chips, and a can of sweetened condensed milk to whip up these bars in no time.
- Effortless Prep: No need to make dough from scratch or fuss with complicated steps. The cake mix does all the heavy lifting!
- Crunchy and Gooey: You get the best of both worlds crunchy bits of toffee combined with gooey, rich chocolate.
- Perfect for Any Occasion: These bars are great for gatherings or simply as an indulgent dessert after dinner.
Ingredients You’ll Need
Here’s a quick look at what you’ll need to make these easy, decadent toffee bars:
For the Base and Filling:
- 1 box yellow cake mix: The foundation for the dough, providing a sweet and buttery base.
- ½ cup unsalted butter, melted 🧈: Adds richness and flavor to the dough.
- 1 large egg 🍳: Helps bind the dough together for a soft yet structured base.
- 1 cup toffee bits 🍬: These crunchy bits are the star of the show, adding texture and caramel flavor.
- 1 can (14 oz) sweetened condensed milk 🥛: For that luscious, creamy filling.
- 1 cup semi-sweet chocolate chips 🍫: Because what’s better than chocolate melting into a bar?
- 1 teaspoon vanilla extract 🍦: A dash of vanilla enhances the flavor of the filling.
Step-by-Step Instructions
Step 1: Preheat the Oven
Before you get started with the dough, preheat your oven to 350°F (175°C). Grease a 9×13-inch baking pan with butter or non-stick spray. You don’t want your bars sticking to the pan, so don’t skip this step!
Step 2: Prepare the Dough Base
In a large mixing bowl, combine the yellow cake mix, melted butter, and egg. Stir until all the ingredients are well combined and the mixture forms a soft dough. This will act as the base for your toffee bars.
Tip: The dough will be thick, but that’s exactly how it should be!
Step 3: Press the Dough into the Pan
Take about two-thirds of the dough and press it evenly into the bottom of your prepared baking pan. Use your fingers or the back of a spatula to spread it out evenly so there are no gaps.
Step 4: Add the Toffee Bits
Once your dough is pressed into the pan, sprinkle 1 cup of toffee bits evenly over the dough layer. The toffee adds a delightful crunch and that classic caramel flavor we all love.
Step 5: Make the Chocolate Mixture
Now it’s time for the gooey chocolate layer! In a small saucepan, combine 1 can of sweetened condensed milk, 1 cup of semi-sweet chocolate chips, and 1 teaspoon of vanilla extract. Heat the mixture over low heat, stirring constantly until the chocolate chips have melted and the mixture is smooth.
Tip: Keep the heat low to avoid burning the chocolate. Stir gently but constantly!
Step 6: Layer the Chocolate Over the Toffee
Once your chocolate mixture is ready, pour it evenly over the layer of toffee bits. Use a spatula to smooth the chocolate so that it completely covers the toffee.
Step 7: Crumble the Remaining Dough
Now, take the remaining one-third of the dough and crumble it over the top of the chocolate layer. You don’t need to cover the chocolate completely just scatter the dough bits evenly across the top to create a crumbly topping.
Step 8: Bake the Toffee Bars
Place the baking pan in the preheated oven and bake for 25-30 minutes, or until the top is golden brown and the edges are set. Keep an eye on the bars during the last few minutes to prevent overbaking. Overbaked bars can become too hard, so you want to pull them out once they’re golden and set.
Step 9: Cool and Serve
Once the bars are done baking, remove the pan from the oven and allow them to cool completely in the pan. Once they’re fully cooled, cut them into squares using a sharp knife. Dust with a little powdered sugar or drizzle with extra chocolate if you want to get fancy.
Serving and Storing Your Cake Mix Toffee Bars
Once cooled and cut, these bars are perfect to serve at any gathering. The mix of buttery dough, crunchy toffee, and smooth chocolate will have everyone reaching for seconds!
- Storage: Store leftover bars in an airtight container at room temperature for up to 5 days. If you live in a warmer climate, pop them in the fridge to keep them fresh and prevent the chocolate from melting.
- Freezing: These bars freeze beautifully! Wrap individual bars in plastic wrap and place them in a freezer-safe container. Freeze for up to 3 months, then thaw at room temperature when you’re ready to enjoy them.
Final Thoughts
With minimal prep time and just a few ingredients, these Cake Mix Toffee Bars are a no-fuss dessert that delivers big on flavor. The combination of rich, gooey chocolate and crunchy toffee bits layered over a buttery cake mix base will leave everyone craving more. Plus, they’re so easy to make that they’re perfect for beginner bakers or anyone looking to whip up a quick treat.
Cake Mix Toffee Bars
The buttery cake base is topped with a layer of toffee bits and a rich chocolate ganache. This recipe is easy to follow and produces a delicious and satisfying dessert.
Ingredients
- For the Base and Filling:
1 box yellow cake mix
1/2 cup unsalted butter, melted 🧈
1 large egg 🍳
1 cup toffee bits 🍬
1 can (14 oz) sweetened condensed milk 🥛
1 cup semi-sweet chocolate chips 🍫
1 teaspoon vanilla extract 🍦
Directions
- 1. Preheat the Oven
- Before you start, preheat your oven to 350°F (175°C). Grease a 9×13-inch baking pan with butter or non-stick spray to ensure that the bars do not stick to the pan.
- 2. Prepare the Dough Base
- In a large bowl, combine the yellow cake mix, melted butter, and egg. Mix until the ingredients are well combined and form a dough. This dough will serve as the base for your toffee bars.
- 3. Press the Dough into the Pan
- Take two-thirds of the dough and press it evenly into the bottom of your prepared baking pan. The dough should cover the entire base of the pan and form an even layer.
- 4. Add the Toffee Bits
- Sprinkle the toffee bits evenly over the dough layer. The toffee will add a crunchy texture and caramel flavor that pairs perfectly with the sweetness of the bars.
- 5. Make the Chocolate Mixture
- In a small saucepan over low heat, combine the sweetened condensed milk, semi-sweet chocolate chips, and vanilla extract. Stir continuously until the chocolate chips have melted and the mixture is smooth. Be sure to keep the heat low to prevent the chocolate from burning.
- 6. Layer the Chocolate Mixture Over the Toffee
- Once the chocolate mixture is melted and smooth, pour it evenly over the toffee bits in the pan. Use a spatula to spread the chocolate mixture so that it covers the toffee layer completely.
- 7. Crumble the Remaining Dough
- Take the remaining one-third of the dough and crumble it over the top of the chocolate layer. This will create a crumbly, golden topping once baked.
- 8. Bake the Toffee Bars
- Place the pan in the preheated oven and bake for 25-30 minutes, or until the top is golden brown and the edges are set. Keep an eye on the bars to ensure they don’t overbake, as this can make them too hard.
- 9. Cool and Serve
- Once the bars are baked, remove them from the oven and allow them to cool completely in the pan. Once cooled, slice the bars into squares and serve. For best results, use a sharp knife to cut clean, even pieces.
Whether you’re making them for a family gathering, a potluck, or simply because you need something sweet in your life, these bars are sure to impress!

