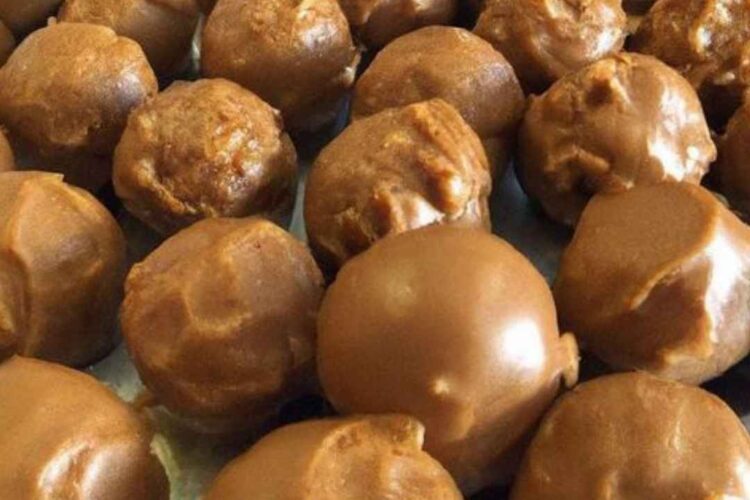
There’s something magical about peanut butter and chocolate coming together in a smooth, creamy truffle that feels like pure indulgence with every bite. These decadent Peanut Butter Chocolate Truffles are easy to make and pack a rich, satisfying flavor that works for any occasion whether you’re prepping a sweet gift for a friend or just treating yourself (because you deserve it!). With their melt-in-your-mouth texture and sweet, nutty goodness, these truffles will quickly become a favorite snack or dessert in your kitchen.
Why You’ll Love It
These truffles are like little bites of heaven. First off, they’re incredibly easy to make no complicated techniques or fancy equipment needed. Plus, the flavor is irresistible. The creamy peanut butter inside contrasts beautifully with the smooth chocolate coating, and you can customize them with milk or dark chocolate depending on your preference. Best of all, they’re versatile! They can be made ahead and stored for those moments when you need a quick, indulgent pick-me-up.
Ingredients List
- 1 ½ cups creamy peanut butter
- ½ cup unsalted butter, softened
- 2 cups powdered sugar
- 1 tsp vanilla extract
- 2 cups milk or dark chocolate chips (for coating)
- 2 tablespoons coconut oil or vegetable oil (optional, for thinning the chocolate)
Pro Tip: If you want to add a little texture, stir in some finely chopped peanuts into the peanut butter mixture before forming the balls. It adds a fun crunch!
Step-by-Step Instructions
Step 1: Prepare the Peanut Butter Mixture
In a large mixing bowl, combine the peanut butter, softened butter, powdered sugar, and vanilla extract. Mix everything together until smooth and stiff don’t worry if it feels a bit thick, that’s exactly what you want for rolling later.
Step 2: Shape the Truffles
Line a baking sheet with parchment paper. Using your hands or a small cookie scoop, roll the peanut butter mixture into 1-inch balls. Place them on the prepared baking sheet as you go. Once you’ve formed all the balls, pop the sheet into the fridge for about 30 minutes to let the truffles firm up. This step makes them much easier to dip in chocolate.
Step 3: Melt the Chocolate
While the truffles are chilling, melt your chocolate chips. You can do this in the microwave in 20-30 second bursts, stirring between each interval, or use a double boiler if you prefer. If your chocolate feels a bit thick, add a tablespoon or two of coconut or vegetable oil to thin it out for easier dipping. Stir until it’s smooth and shiny.
Step 4: Coat the Truffles
Now the fun part dipping! Remove the chilled peanut butter balls from the fridge. Using a fork or a truffle-dipping tool (if you’re fancy like that), dip each ball into the melted chocolate, making sure it’s completely covered. Let the excess chocolate drip off before placing the truffle back onto the parchment paper. Repeat with all the truffles.
Step 5: Set and Serve
Once all the truffles are coated, pop them back in the fridge for another 15-20 minutes to let the chocolate harden. After that, they’re ready to devour!
Engagement Elements: A Personal Touch and Variations
A Sweet Memory: These truffles remind me of making holiday treats with my mom. We’d make big batches and package them up for friends and family, but we’d always keep a stash for ourselves. There’s something about that rich peanut butter filling paired with smooth chocolate that just makes you feel like a kid again.
Serving Ideas: While these are perfect on their own, they’re also great paired with coffee or crumbled over ice cream for an extra indulgent dessert. Want to mix it up? Try rolling the truffles in chopped nuts or sprinkles before the chocolate sets for a fun, festive look!
Closing: Try Them and Share!
These Peanut Butter Chocolate Truffles are a must-try for any peanut butter lover. They’re easy, delicious, and perfect for sharing or not! Go ahead, give them a whirl, and don’t forget to leave a comment below with your thoughts or any fun variations you tried. I’d love to hear how yours turned out! Oh, and if you’re feeling proud of your creations, snap a picture and share it with me on social media I’m always excited to see what you’ve been cooking up!
Enjoy every sweet bite!
